Hello all
Today I will show you how to do unit test of a .NET project with NUnit. NUnit is a great tool to do unit test of any .NET project.As its a third party tool so you have to download it from here . I assume that you all are familiar with unit test.For the simplicity I will show you a simple example,Once when you are habituated with this took you will find yourself in many complex test script.
first I opened an new class project named Calculation.Core.
then I added two method which will be tested through NUnit.
The class file's is "Calculation" and those two methods are DoAdd & DoSub which will add two numbers and subtract two numbers.Both's return type and parameters type are integer .
namespace Calculation.Core
{
public class Calculation
{
public int DoAdd(int firstNumber, int secondNumber)
{
return firstNumber + secondNumber;
}
public int DoSub(int firstNumber, int secondNumber)
{
return firstNumber - secondNumber;
}
}
}
now I added another class project named Calculation.Test and Add Reference of the Calculation.Core project. and also make Add DLL Reference of NUnit's "nunit.framework.dll" from my NUnit's installed location "C:\Program Files (x86)\NUnit 2.4.8\bin\nunit.framework.dll" .This will vary according to your installation of NUnit.
now I have to include namespace in the file by typing :
using NUnit.Framework;
now we have to add the "[TestFixture]" attribute to the CalculationTest class and "[Test]" attribute to the DoAddTest ,DoFailTest & DoSubTest methods.
using NUnit.Framework;
namespace Calculation.Test
{
   [TestFixture]
    public class CalculationTest
    {
       [Test]
       public void DoAddTest()
       {

           Calculation.Core.Calculation sub = new  Calculation.Core.Calculation();
           int result = sub.DoSub(3,1);
           Assert.Greater(3, result);
       }

       [Test]
       public void DoSubTest()
       {
           Calculation.Core.Calculation sub = new Calculation.Core.Calculation();
           int result = sub.DoSub(3, 1);
           Assert.Greater(3, result);
       }

       [Test]
       public void DoFailTest()
       {
           Calculation.Core.Calculation sub = new Calculation.Core.Calculation();
           int result = sub.DoSub(3, 1);
           Assert.Greater(1, result);
       }
    }
}
Now we have to select the Calculation.Test project as Starup project and select the "Properties" from the Solution Explorer .
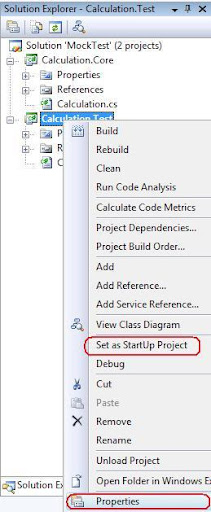
Now form the Calculation.Test tab we have to select Debug then select Start External Program and set the location of NUnit.exe then select Command line argument and write the dll name of the test project .

now when we will run the application then NUnit will automatically start and we have to press run button to show the unit test result.
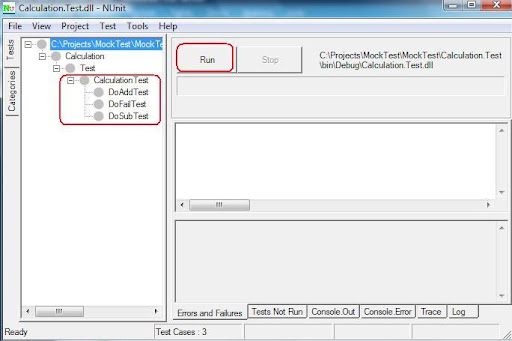
In the result we will see that the two method of our test script has passed but one fail as I didn't give the proper assert method .
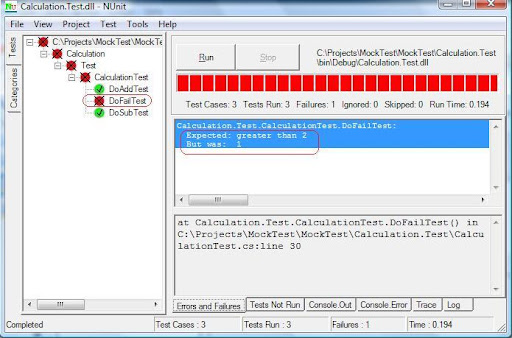
in this way we can do unit test with NUnit. There are also many useful method of NUnit's to test the script.
BYE